How it started
I saw the documentary, TEACH, and was interested in 360 Degree Math. My room obviously wasn't set up for this, so I did what any resourceful teacher would do. I laminated some chart paper and stapled it up over bulletin boards! Don't judge me. I really wanted this, so I had to do it! The kids loved it! I have to admit, I didn't follow the 360 format as designed. I started with just having the kids up out of their seats.
By chance, we were visited by the superintendent and district board members while we were up and working on a Bedtime Math question. It was perfect and they even tweeted about us!
Preparation
While planning for the 2014-2015 year, I knew real whiteboards were not an option. I looked into the dry erase panels at Home Depot. After getting permission from the one and only, our head custodian, I was ready to start!
There was a helpful man and he cut the 4'x8', 32 sq. ft Hardboard White Tile Board (about $13 each panel) into four pieces (2'x4'.) Along with some outdoor mounting tape, (about $15) I was ready to go! I ended up buying 3 panels and a roll of the tape. You'll need to measure the length of your wall to see how many panels you'll need. Before going to Home Depot, I knew that I needed one of the 2'x4' pieces cut down to fit a smaller space near the corner of my walls.

I have two large walls that I am using. I put about 8-10 pieces of the tape on the back of the panels and after wiping down the walls, I started sticking them up.

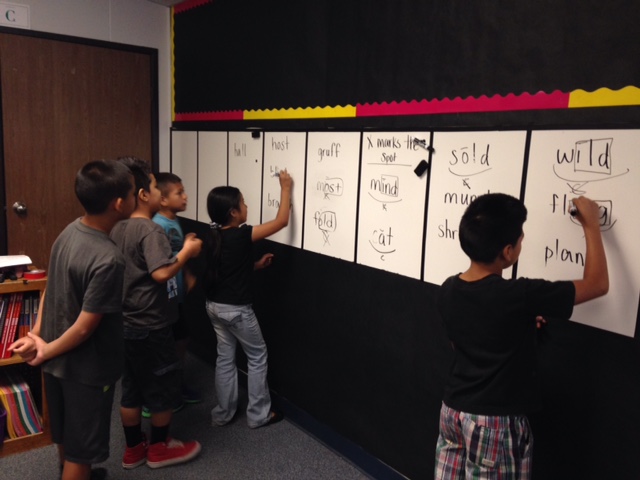
I added some bulletin board paper above and below. There was a lot of residue and marks on my walls around the laminated chart paper so I went with black paper.


The What
For the "What" of 360 Math, visit their site for a detailed explanation of how to use the boards in a lesson. Although, these boards have been a huge addition to my room in math, they truly are useful in all subjects...like Spelling (below). Getting kids up and moving is important - and mine love it!
**update**
For the 2016-2017 school year, I had to take down the black paper. It made the room feel dark and although it hid the marker residue, I needed a change, a more welcoming feel to our room. I lightened up the paper and added clips for the problem slips.

I also added a border along the bottom and top of the boards with more electrical tape. Because the boards take up so much wall space, I use the area below to hang any anchor charts we made. Oh, and I went with tables! I love love love the tables!

Be amazing!


No comments:
Post a Comment